Ease Medical Apparatus And Instruments Ease Medical Apparatus And Instruments
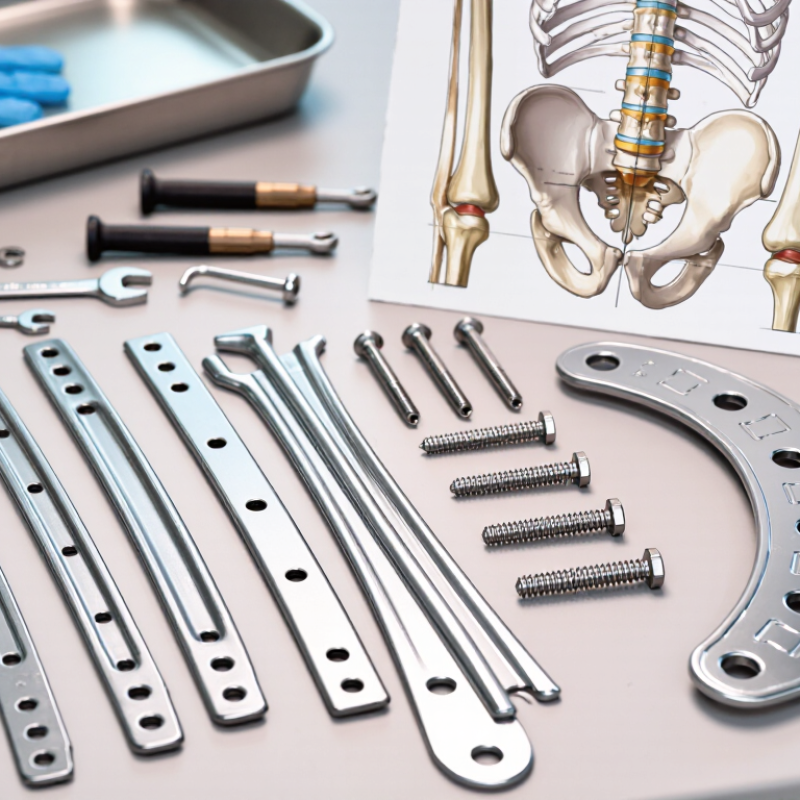
How to Choose the Right Locking Plate Instrument?

Time:2026-10-03 Author:Liam
0%

Choosing the right Locking Plate Instrument begins with the fracture, not the catalogue.

A distal radius fracture needs different contouring, screw angles, and handling than a proximal tibia injury. Surgeons must examine bone quality, fracture geometry, soft-tissue coverage, and the intended surgical approach. Plate length matters. So does instrument balance. A driver that slips inside a narrow wound can waste valuable operating time.

The global orthopedic trauma devices market reflects this growing demand. Grand View Research estimated its value at approximately USD 8.8 billion in 2023, with continued expansion expected through 2030. MarketsandMarkets also identified trauma fixation as a major segment, driven by aging populations, sports injuries, and improved implant technologies. These reports describe market direction, not clinical success. That distinction matters.

Stephan Perren, a pioneer of modern fracture fixation, described the locking plate as acting “like an internal fixator.” His observation remains practical today. A locking construct can improve angular stability, especially in osteoporotic or metaphyseal bone. It cannot correct poor reduction, unsuitable plate placement, or careless screw selection.

Experience exposes the uncomfortable part: more instruments do not always create better surgery. A crowded tray may increase confusion. An incomplete tray can create dangerous delays. Surgeons, nurses, and manufacturers should assess compatibility, sterilization workflow, tactile control, and emergency alternatives before choosing a system.

This guide compares those details closely. Evidence helps, but evidence is not flawless. Instrument selection still requires judgment, training, and case-specific review.

How to Choose the Right Locking Plate Instrument?

Define the Surgical Goal and Fracture Characteristics

How to Choose the Right Locking Plate Instrument?

Define the surgical goal before selecting any locking plate instrument. The aim may be stability, alignment, compression, or protection of fragile bone. Fracture location matters greatly. A simple metaphyseal fracture needs different control than an articular fracture with several small fragments. Review radiographs and, when necessary, CT images before preparing the tray. Consider bone quality, soft-tissue condition, fracture length, and the planned surgical approach.

Instrument choice should match the plate’s required screw paths and reduction technique. A locking drill guide helps maintain the intended angle. A depth gauge supports accurate screw length selection. A torque-limiting handle may reduce the risk of over-tightening.

For difficult reductions, clamps, temporary wires, and a suitable bending instrument can be important. However, more instruments do not always mean better preparation. A crowded tray can slow decisions.

Tips: Match every instrument to one surgical step. Check compatibility before incision. Keep backup options available. Measure carefully. Do not rely on habit alone. A perfect plan may still need adjustment when bone quality or fragment behavior differs from imaging. The fracture often teaches more during exposure.

Match Plate Design to Bone Anatomy and Fracture Stability

How to Choose the Right Locking Plate Instrument?

Match the plate to bone anatomy before selecting instruments. A distal radius plate should follow the volar curve, while a proximal humerus plate must respect the tuberosity and rotator cuff. Poor contour can create soft-tissue irritation, even when screw placement looks accurate. The International Osteoporosis Foundation reports that one in three women and one in five men over 50 may experience an osteoporotic fracture. This matters because weak bone needs controlled fixation, not simply more screws.

Fracture stability should guide the construct. In a simple fracture, compression may support direct healing. In a comminuted fracture, bridge plating can preserve biology and span the damaged zone. Locking screws provide angular stability, but they do not automatically create stability at the fracture site. The plate length, working distance, screw distribution, and bone quality still matter. AO Surgery Reference recommends preserving the fracture environment and avoiding unnecessary periosteal disruption during fixation.

Instrument choice should follow the plate’s intended function. A targeting guide can improve screw trajectory, but it cannot correct a poorly selected plate. Measure the near cortex carefully. Confirm the far cortex and avoid joint penetration. The AAOS clinical practice guidance also stresses patient-specific planning for fragility fractures, although evidence remains imperfect across fracture patterns. That limitation deserves attention. Surgeons should reassess alignment under imaging, especially when the bone feels soft or the fracture behaves unpredictably. Small errors become expensive.

Select Compatible Instruments, Screws, and Locking Options

Choosing the right locking plate instrument begins with compatibility, not convenience. Match the plate system with its approved drill guides, insertion handles, and torque-limiting drivers. The guide must align cleanly with each hole. Even slight movement can affect screw trajectory. Confirm the screw diameter, length range, thread design, and locking interface before preparation. A screw that fits the plate may still be unsuitable for the selected instrument.

Locking options also require careful planning. Fixed-angle locking can provide stable support, while variable-angle systems may offer more flexibility around a fracture line. Use only compatible screws and drivers listed in the technical documentation. Check the instrument markings under good lighting. Small details matter. In practice, teams sometimes focus on plate shape and overlook the driver connection. That oversight can delay a procedure. I still recheck the torque setting, because memory is not a reliable measuring tool.

Tips: Lay out the plate, guides, drill bits, screws, and driver together before use. Test the connection without force. Inspect threads for damage. Keep a backup instrument available. Ask the surgical team to confirm the locking plan and sterilization status. A final dry run may feel repetitive, but it can reveal an incompatible guide or missing screw size. Selection should follow the device instructions and the judgment of qualified orthopedic professionals.

How to Choose the Right Locking Plate Instrument?

Select instruments, screws, and locking options that match the plate system and nominal screw diameter.

The chart compares common nominal locking-screw diameters used in orthopedic plating systems. Instrument selection should match the screw diameter, thread profile, drive interface, and locking-hole design. A drill guide, screwdriver, depth gauge, and torque-limiting device must be compatible with the selected plate-and-screw system. Always verify the system instructions for use before clinical application.

Verify Surgical Technique, Handling, and System Compatibility

How to Choose the Right Locking Plate Instrument?

Choosing a locking plate instrument requires more than checking its appearance. Confirm the surgical technique it supports, including drilling, measuring, tapping, and screw insertion. The instrument should match the plate’s locking mechanism and intended fixation method. Small differences in thread design can affect screw seating and stability.

Handling matters during real procedures. Test the grip with gloved hands. Check whether the drill guide remains centered under gentle pressure. A depth gauge should be easy to read in limited visibility. Instruments must also tolerate cleaning, sterilization, and repeated use without losing accuracy. I have found that awkward handles can slow the procedure, even when the system appears technically suitable. That detail is easy to overlook.

Verify system compatibility before the operation. Compare the instrument set with the current surgical technique guide, implant dimensions, screw diameters, and available attachments. Do not rely on memory or similar-looking components. A guide that fits loosely may create an inaccurate trajectory. Confirm compatibility with the tray inventory, power equipment, and sterilization process as well. A short trial on a training model can reveal alignment problems early. Still, one trial cannot replace validated instructions or proper clinical training. Rechecking these details may feel repetitive, but it prevents avoidable confusion when every minute matters.

How to Choose the Right Locking Plate Instrument? — Verify Surgical Technique, Handling, and System Compatibility
Evaluation Area Instrument or Feature What to Verify Practical Verification Method Acceptance Criteria Potential Consequence of Mismatch
Surgical Technique Threaded drill guide The guide must align the drill with the threaded locking hole at the intended fixed angle. Insert the guide into the plate hole on a matching trial plate and confirm stable seating without rocking. The guide seats fully, maintains the specified trajectory, and does not damage the plate threads. Off-axis drilling, damaged threads, or inability to achieve the intended screw trajectory.
Surgical Technique Drill bit and drill guide combination Drill diameter, working length, and guide type must correspond to the selected screw system and surgical approach. Compare the instrument identification, diameter marking, and length with the current surgical technique and instrument list. The drill passes freely through the guide and matches the specified screw preparation requirements. Inadequate thread engagement, excessive bone removal, or inaccurate screw placement.
Surgical Technique Depth gauge The gauge must measure the prepared hole using the same reference point defined by the system technique. Confirm that the hook or measuring tip reaches the far cortex and that the scale is readable from the operative field. The measured length corresponds to the available screw lengths and includes the system-defined measurement reference. A screw may be too short for fixation or excessively prominent beyond the far cortex.
Surgical Technique Compression and reduction instruments Reduction forceps, clamps, and compression devices must provide controlled force without interfering with the plate or soft tissues. Test the instrument on the selected plate profile and verify access from the planned surgical direction. The instrument holds securely, allows controlled adjustment, and does not obstruct screw insertion. Loss of reduction, plate deformation, soft-tissue interference, or poor access to the locking holes.
Surgical Technique Plate bending instrument Bending tools must be approved for the specific plate geometry and must not deform locking holes or threaded surfaces. Use the dedicated bending area, if provided, and inspect the plate after bending for distortion or thread damage. The plate conforms to the intended anatomy while locking holes remain functional and undistorted. Loss of screw-to-plate engagement, altered fixation angle, or plate fatigue.
Handling Ergonomic grip and access The handle should permit controlled rotation and axial force while maintaining visibility and clearance around the incision. Hold the instrument in the intended working position and simulate insertion, drilling, and screw tightening. The instrument can be operated with controlled force and does not slip or obstruct the operative view. Uncontrolled instrument movement, inaccurate placement, or increased procedure time.
Handling Screwdriver shaft and tip The driver tip must fully engage the screw recess and remain coaxial during insertion and tightening. Engage the driver with a representative screw and check for complete seating, rotational stability, and easy release. The tip engages without excessive play, supports axial control, and does not strip the screw recess. Screw head damage, incomplete insertion, inability to remove the screw, or loss of fixation control.
Handling Torque-limiting screwdriver The torque setting must be the value specified for the selected locking screw and plate system. Check the current instrument label, calibration status, and applicable surgical technique before use. The instrument is within its calibration period and the selected torque setting matches the system instructions. Insufficient locking, screw or plate damage, or excessive stress on the bone-plate construct.
Handling Instrument markings Diameter, length, left/right orientation, torque, and function markings must remain legible after cleaning and sterilization. Inspect markings under adequate lighting and compare them with the instrument inventory and procedure checklist. All critical markings are permanent, readable, and unambiguous at the point of use. Selection errors, incorrect drilling, wrong screw length, or incorrect torque application.
System Compatibility Plate hole geometry The instrument must match the plate hole type, including threaded locking holes, combination holes, or variable-angle holes. Test the instrument on the exact plate family or an approved representative trial and verify complete seating. The instrument engages the intended hole type without cross-threading, wobble, or unintended angular freedom. Misaligned drilling, damaged plate threads, or inability to lock the screw at the planned angle.
System Compatibility Screw diameter and thread profile Drills, taps, screwdrivers, depth gauges, and torque tools must correspond to the screw diameter and thread design. Cross-check the instrument markings against the screw specifications and the system-specific technique guide. Every instrument in the screw pathway is approved for the same screw size and thread configuration. Poor screw purchase, cross-threading, incomplete locking, or instrument breakage.
System Compatibility Fixed-angle versus variable-angle function A fixed-angle guide must not be substituted for a variable-angle guide, and vice versa, unless specifically authorized. Confirm the allowable insertion angle and guide function in the current instructions for use. The selected guide supports the intended angular range and produces stable screw-to-plate engagement. Loss of angular control, incomplete locking, or reduced construct stability.
System Compatibility Instrument-to-plate interface Targeting arms, drill guides, aiming blocks, and insertion handles must connect to the correct plate interface. Assemble the components outside the sterile field and verify secure attachment, alignment, and release. The connection is stable, repeatable, and free from excessive play or unintended disengagement. Incorrect hole targeting, loss of alignment, or instrument detachment during surgery.
Sterilization and Maintenance Cleaning and sterilization compatibility Reusable instruments must have validated cleaning, inspection, packaging, and sterilization instructions. Review the current reprocessing instructions and inspect joints, cannulations, tips, and surfaces after processing. The instrument is clean, undamaged, functional, and released according to the facility's validated process. Bioburden risk, corrosion, impaired function, or delayed procedure due to instrument failure.
Documentation Instructions for use and compatibility records The selected instruments must be listed in the current system documentation and traceable by catalog or inventory identifier. Compare the tray contents, instrument identifiers, surgical technique, and implant selection before the procedure. The complete instrument set is documented, traceable, and consistent with the selected implants. Use of an unvalidated combination, incomplete setup, or inability to investigate a device issue.
Selection rule: Choose instruments only after confirming the exact plate hole geometry, screw diameter and thread design, allowable insertion angle, torque requirement, surgical technique, and validated reprocessing instructions. When compatibility is uncertain, consult the current system-specific instructions for use rather than relying on visual similarity.

Assess Sterilization, Quality Standards, and Clinical Support

Choosing a locking plate instrument requires more than checking its shape or price. Sterilization performance deserves close attention because small hinges, grooves, and cannulated parts can retain biological material. Look for clear cleaning instructions, validated sterilization parameters, and designs that allow visual inspection. Simple surfaces help.

Quality standards should be supported by evidence, not vague claims. Ask whether the instruments undergo dimensional checks, corrosion testing, and functional inspection after repeated sterilization cycles. Traceability also matters. Each instrument should have identifiable records for materials, production batches, and maintenance history. In a busy operating room, a reliable tracking system can prevent confusion when instruments look nearly identical.

Clinical support is equally practical. Technical staff should explain assembly, handling, reprocessing, and compatibility with the selected plate system. Training materials should use clear images and realistic procedure steps. When questions arise during a case, responsive support reduces avoidable delays. Still, support cannot replace clinical judgment. A polished instrument set may appear complete, yet one missing size can disrupt an otherwise careful plan. That possibility deserves review. Ask for feedback from surgeons, nurses, and sterile processing teams after actual use. Their observations may reveal awkward grips, unclear markings, or cleaning difficulties that factory testing misses. Instruments should be reassessed when procedures, sterilization equipment, or hospital protocols change.

FAQS

What should be defined before selecting an instrument?

Define whether the surgery needs stability, alignment, compression, or protection of fragile bone. Fracture location also matters. Review radiographs, and use CT when needed. Bone quality and soft-tissue condition can change the plan. A simple metaphyseal fracture may need different control than a fragmented articular fracture.

How do fracture characteristics affect the instrument tray?

Fragment number, fracture length, and surgical approach guide instrument selection. Difficult reductions may require clamps, temporary wires, or a bending instrument. More instruments are not always better. A crowded tray can slow decisions. Keep useful backups, not every possible tool.

Which instruments support accurate screw placement?

A locking drill guide helps maintain the planned screw angle. A depth gauge supports accurate screw length selection. A torque-limiting handle may reduce over-tightening risk. Measure carefully. Do not rely on habit.

How can instrument compatibility be checked?

Match the plate with its approved guides, insertion handles, and torque-limiting drivers. Confirm hole alignment, screw diameter, length range, thread design, and locking interface. Test connections without force. Small details matter.

What is important when choosing fixed-angle or variable-angle locking?

Fixed-angle locking can provide stable support. Variable-angle locking may offer flexibility near a fracture line. Select only compatible screws and drivers. Follow technical documentation and professional judgment. Flexibility is not automatically better.

What should be checked before incision?

Lay out the plate, guides, drill bits, screws, and driver together. Inspect threads and markings under good lighting. Confirm sterilization status. Run a dry test. It may feel repetitive. Missing sizes can delay the procedure.

Why should torque settings be rechecked?

Correct torque may reduce the risk of over-tightening. Recheck the setting instead of trusting memory. A driver connection may look correct but still need inspection. I still recheck it. Memory is not a reliable measuring tool.

Can the surgical plan change during exposure?

Yes. Bone quality or fragment behavior may differ from imaging. Adjust the approach when actual findings require it. The fracture often teaches more during exposure. A perfect plan may still need adjustment. Final choices belong to qualified orthopedic professionals.

Conclusion

Choosing the right Locking Plate Instrument begins with a clear understanding of the surgical objective, fracture pattern, bone quality, and anatomical location. The selected plate should match the contours of the bone while providing appropriate stability for the fracture, whether the goal is compression, bridging, or support of a complex fragment. Plate length, hole configuration, screw direction, and fixation strategy should all be considered together rather than selected independently.

The instrument set must be compatible with the intended screws, locking mechanisms, drill guides, and insertion tools. Surgeons should confirm that the system supports the planned technique and allows precise handling during preparation and implantation. Before use, assess sterilization requirements, material quality, documentation, and system reliability. Clear instructions, staff training, and responsive clinical support can also improve procedural efficiency and reduce avoidable errors. Final selection should always follow professional judgment, applicable surgical protocols, and the specific patient’s needs.

Liam

Liam

Liam is a dedicated marketing professional with a profound expertise in the industry, where he excels at highlighting the unique advantages of our core products. With a keen understanding of market trends and consumer needs, Liam frequently updates our company’s professional blog, providing......
