Ease Medical Apparatus And Instruments
Choosing the right Intramedullary Nail Instrument is a clinical and technical decision, not a simple purchasing task. The instrument must match the nail system, anatomical site, surgical approach, and expected fracture pattern. A handle that feels stable in the hand can still create alignment problems if its connection is inaccurate. Small details matter, especially when visibility is limited and soft tissues are already under pressure.
Experienced surgical teams usually examine compatibility before reviewing price. They check targeting accuracy, locking options, radiolucent features, sterilization requirements, and the availability of replacement parts. The instrument should support controlled insertion without excessive force. It should also provide clear feedback during reaming, guidewire placement, and distal locking. Manufacturer specifications are useful, but they should not replace clinical judgment. Product claims need comparison with technical documentation, training materials, and hospital experience.
There is no perfect checklist. Each fracture is different. Even a familiar system may feel unsuitable in an unusual case. This guide explores practical selection criteria, including material quality, ergonomic design, imaging compatibility, and maintenance reliability. It also considers overlooked issues, such as glove grip, cleaning access, and instrument balance under fluoroscopy. A thoughtful choice reduces avoidable delays and supports consistent surgical workflow. Still, instrument selection cannot guarantee outcomes. Surgeon training, patient factors, imaging quality, and intraoperative decisions remain equally important. The goal is not to choose the most complex tool, but the most dependable one for the intended procedure.
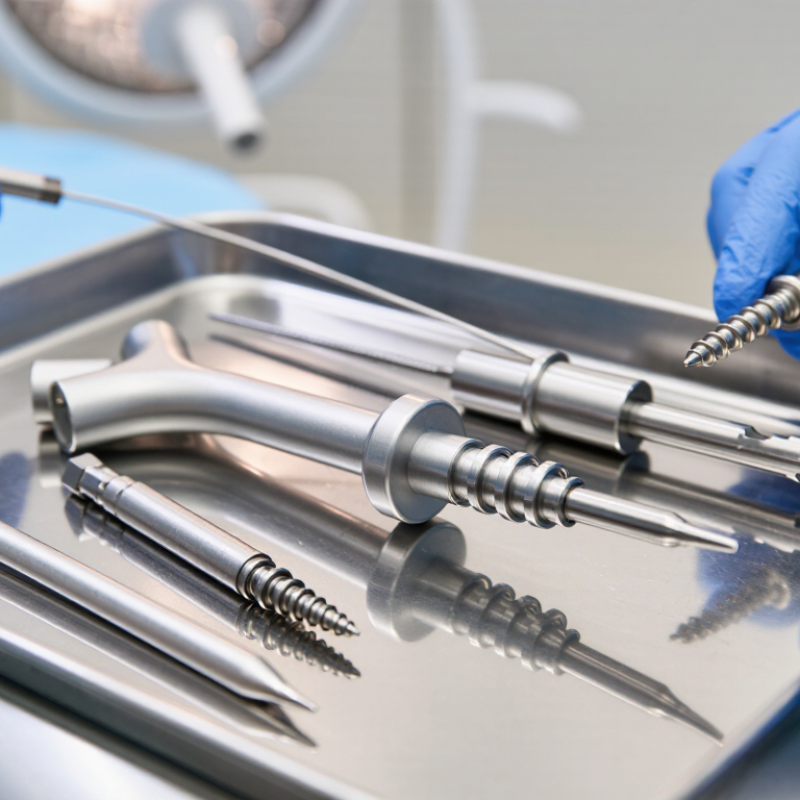
How to Choose the Right Intramedullary Nail Instrument?
Understanding Intramedullary Nail Instruments and Their Clinical Purpose
Intramedullary nail instruments support fracture reduction, canal preparation, nail insertion, and locking screw placement. Their purpose is practical, not decorative. A targeting guide helps align screws with the nail’s locking holes. Reamers prepare the medullary canal to match the planned implant. Depth gauges and drill guides help control screw length and trajectory.
In clinical practice, instrument choice should reflect fracture location, bone anatomy, and the planned nail design. A narrow canal may require careful reaming and smaller instruments. A complex fracture can demand reduction tools before nail insertion. Fluoroscopy confirms alignment during key steps. Small errors matter. An off-axis drill can complicate locking and increase surgical time. The operating team must also check instrument compatibility, sterility, completeness, and mechanical condition before use. I have found that trays can look complete while missing one essential guide. That weakness deserves honest attention.
Tips: Match each instrument with the surgical plan and nail dimensions. Check the tray against its contents list before preparation. Test guides, handles, and depth gauges for damage. Keep backup options available when anatomy is unpredictable. Follow approved instructions and local clinical protocols. The surgeon’s judgment remains central.
Choosing an intramedullary nail instrument begins with the fracture, not the instrument tray. Review radiographs and, when needed, CT images to identify the fracture level, pattern, length, and rotation. A narrow canal, bowed femur, or limited entry point can change the plan. Patient anatomy matters. Previous implants, bone quality, and soft-tissue condition may also affect access and positioning.
The instrument set should support accurate guidewire placement, canal preparation, nail insertion, and locking. Confirm that reamers, targeting guides, depth gauges, and locking tools match the selected nail system. Measure carefully, but do not treat one measurement as absolute. Imaging magnification, patient positioning, and canal curvature can create small errors with serious consequences. Experienced teams compare templating with intraoperative findings and keep suitable alternatives available. That extra step may feel inefficient. It is often safer.
Tips: Check the full instrument set before incision. Test the targeting guide and confirm locking screw lengths. Keep backup guidewires and extraction tools ready. Protect the entry site and verify alignment in more than one view. A checklist helps, but it cannot replace surgical judgment. Reflect after difficult cases; an unclear step may reveal a weakness in planning, training, or equipment selection.
Choosing an intramedullary nail instrument starts with the implant specification, not the tray label. The nail’s diameter, length, curvature, and locking-hole position must guide every selection. A 2022 Lancet analysis of the Global Burden of Disease Study reported 178 million new fractures worldwide in 2019. That scale makes repeatable instrument matching essential.
For a curved nail, confirm the insertion handle follows the same bow and rotation. A straight guide can create resistance, inaccurate seating, or avoidable cortical stress. Check the targeting jig against the nail’s locking-hole pattern, diameter, and left-right orientation. Verify guidewire size, reamer range, extractor thread, and end-cap interface from the current implant documentation. Do not trust visual similarity. A near-fit is not a fit.
Instrument clearance also matters. Fluoroscopy access, radiolucent components, and hand clearance can change the workflow in a crowded operating room. The World Health Organization reports that musculoskeletal conditions affect about 1.71 billion people globally, reinforcing the need for dependable surgical systems.
Still, specifications may be misunderstood during urgent cases. I would pause and recheck the catalog number, not rely on memory. That delay is minor. An overlooked mismatch is not. In practice, a dry run with the actual nail, targeting arm, and locking bolts can reveal problems before incision. My own preference would be to document each compatibility check, because confidence alone is an imperfect quality control.
How to Choose the Right Intramedullary Nail Instrument?
Choosing an intramedullary nail instrument requires more than checking its price or appearance. The instrument must provide controlled insertion, stable locking, and clear alignment during surgery. A slightly loose targeting arm can create a serious problem. Compatibility should be verified against nail diameter, length, locking-hole position, and surgical approach. Do not rely only on catalog images. Measure the connection points and confirm tolerances with the technical file.
Instrument quality also affects infection prevention. The WHO Global Guidelines for the Prevention of Surgical Site Infection report that surgical site infections affect up to one-third of patients after surgery in some settings. Therefore, inspect hinges, cannulas, threads, and reaming guides for residue or surface damage. The FDA’s reprocessing guidance stresses validated cleaning, disinfection, and sterilization instructions for reusable devices. A clean-looking instrument is not always a safe instrument. This is an easy detail to underestimate.
Tips: Request material certificates, dimensional drawings, and sterilization instructions. Check trial instruments before procurement. Record each compatibility test. Ask whether replacement parts remain available. If a handle feels rough, stop and investigate. Small friction may signal larger failure. Also, review the system with surgeons, nurses, and sterile-processing staff. Their feedback may reveal workflow weaknesses that specifications miss. No evaluation is perfect; human factors still deserve honest review.
Non-brand evaluation framework for assessing instrument quality, compatibility, and surgical safety
The chart uses a 100-point procurement assessment model. Surgical safety receives the highest weighting because secure fixation, controlled insertion, reliable locking, and effective sterilization directly influence procedural risk. Quality and compatibility should also be verified against the nail system’s technical specifications, applicable medical-device requirements, and the hospital’s sterilization process. These values are evaluation weights, not clinical outcome rates.
Choosing an intramedullary nail instrument set starts with the fracture pattern, not the tray label. Review imaging, nail diameter, locking options, and the patient’s anatomy before opening supplies. A practical plan should include guides, reamers, targeting sleeves, depth gauges, extraction tools, and backup instruments. Keep essential alternatives available. Small gaps can delay fixation.
The World Health Organization reported that its Surgical Safety Checklist study reduced major complications from 11.0% to 7.0% across eight hospitals. This finding supports a short, consistent instrument check before incision. The circulating nurse and surgical team should confirm sizes, sterility indicators, packaging integrity, and device compatibility together. Do not rely on memory alone. A printed or electronic checklist is safer.
Preparation must also reflect reprocessing realities. The Centers for Disease Control and Prevention identifies thorough cleaning as a necessary step before sterilization. Complex cannulated instruments need special attention, including internal channels, joints, and retained debris.
AORN guidance recommends following validated manufacturer processing instructions and documenting deviations. In practice, teams sometimes overestimate tray completeness. That assumption deserves review.
A dry run can reveal missing sleeves, incorrect guide wires, or incompatible connectors before the patient enters the room. According to WHO’s Global Guidelines for Safe Surgery, clear team communication remains central to reducing preventable surgical risk.
Start with the fracture pattern, not the instrument tray. Review radiographs and CT images when necessary. Check fracture level, length, rotation, and canal shape. A bowed femur or narrow canal may change the surgical plan.
Consider bone quality, previous implants, soft-tissue condition, and the available entry point. Patient anatomy can limit access or positioning. Small anatomical differences matter.
The set should support guidewire placement, canal preparation, nail insertion, and locking. Common items include reamers, targeting guides, depth gauges, locking tools, and extraction instruments. Keep backup guidewires available.
Confirm the nail diameter, length, locking-hole position, and surgical approach. Check connection points and tolerances using technical drawings. Do not trust catalog images alone. A loose targeting arm can affect alignment.
Imaging magnification, patient positioning, and canal curvature can create errors. Never treat one measurement as absolute. Compare planning measurements with intraoperative findings. Keep a suitable alternative ready.
Check the complete instrument set, packaging, sterility indicators, and device compatibility. Test the targeting guide. Confirm locking screw lengths. A short checklist helps.
Inspect hinges, cannulas, threads, internal channels, and reaming guides. Remove retained debris before sterilization. Follow validated cleaning and sterilization instructions. A clean-looking instrument may still be unsafe.
A dry run can reveal missing sleeves, incorrect guidewires, or incompatible connectors. It also exposes workflow gaps before the patient enters the room. This step may feel slow. It is often safer.
Surgeons, nurses, and sterile-processing staff should review it together. Their practical feedback may reveal problems that specifications miss. No plan is flawless. Difficult cases deserve honest reflection afterward.
Choosing the right Intramedullary Nail Instrument is essential for supporting accurate, efficient, and safe fracture fixation. The selection process begins with understanding the instrument’s clinical purpose and evaluating the fracture pattern, bone anatomy, access requirements, and surgical approach. These factors help determine the appropriate instrument configuration and ensure that it supports the intended procedure without unnecessary complexity.
The instrument must also match the nail’s design, dimensions, locking mechanism, and implant specifications. Before surgery, clinicians should assess material quality, durability, compatibility, ergonomic handling, and sterilization requirements. A practical preparation plan should include checking the complete instrument set, confirming measurements, inspecting connection points, and arranging the tools in the order they will be used. Careful planning reduces delays, improves procedural control, and promotes consistent surgical performance while supporting patient safety.
